To make your projector work better from day one, focus on precise setup. Make sure the lens is perfectly aligned and centered relative to the screen. Position the projector at the right distance based on its throw ratio to get the best image size and focus. Mount it securely to avoid shifting, and adjust lens shift controls or keystone correction only when necessary. When you pay attention to these details, you’ll enjoy sharp, consistent images with less hassle—there’s more to uncover if you keep exploring.
Key Takeaways
- Ensure precise lens alignment to prevent image blurriness and distortion from the start.
- Properly position the projector at the correct distance based on the throw ratio.
- Mount the projector securely on a level, sturdy ceiling mount to maintain consistent alignment.
- Use accurate measurements to center the projector and achieve the desired image size immediately.
- Perform keystone correction only as a last resort, aiming for proper placement and alignment from the beginning.

Have you ever struggled to get your projector set up just right? It’s frustrating when the image isn’t sharp, or it’s distorted, and you spend more time fiddling than enjoying your movie or presentation. The key to avoiding these headaches from the start lies in following a simple but essential setup rule: prioritize proper lens alignment and ceiling mounting. When you get these right, your projector will perform better immediately and stay consistent over time.
First, focus on lens alignment. This step is vital because even small misalignments can cause blurry images, keystone distortion, or uneven focus. You want the lens to be perfectly centered relative to the screen, with the projector positioned at the right distance to produce a properly sized image. Use a measuring tape to ensure the projector is placed at the ideal distance based on its throw ratio. Once positioned, carefully adjust the lens alignment so the image is square and centered on the screen, avoiding any skewed or trapezoidal shapes. Most projectors have lens shift controls or keystone correction features, but relying on these should be your last resort—they can degrade image quality. Achieving precise lens alignment upfront makes a noticeable difference in clarity and sharpness, saving you time during setup and guaranteeing a more professional look. Additionally, accurate setup ensures optimal image quality from the start, reducing the need for frequent adjustments later. Understanding the watt-hours capacity of your projector setup can also help you plan for longer sessions without interruptions. Proper mounting technique is also essential to maintain consistent alignment and prevent shifts over time. Using a dedicated projector mount designed for your specific model can further improve stability and ease of adjustment. Ensuring proper weight distribution during installation can help prevent sagging or misalignment over time.
Next, pay close attention to ceiling mounting. Mounting your projector securely to the ceiling offers stability, consistent positioning, and a cleaner setup. When ceiling mounting, ensure the mount is level and firmly attached to a sturdy ceiling joist or support structure. This prevents any wobbling or shifting that could throw off your image alignment over time. Position the mount so the projector is centered horizontally and at the correct height relative to the screen. This not only guarantees ideal lens alignment but also simplifies future adjustments. Proper ceiling mounting also protects your equipment, reduces clutter, and makes it easier to control your projector’s angle and focus.

Universal Line Marker Repair Parts Accessories for 8/12 Lines 360° Levels Lightweight Simple Assembly Professional
【Professional Accessories】 Level Accessories line projector marker, which meets accurate alignment demands in construction, renovation, and similar scenarios
As an affiliate, we earn on qualifying purchases.
As an affiliate, we earn on qualifying purchases.
Frequently Asked Questions
How Often Should I Recalibrate My Projector After Setup?
You should recalibrate your projector every 6 to 12 months to maintain color accuracy and optimize lamp lifespan. Regular calibration helps guarantee consistent image quality, especially if you notice color shifts or dimming. If you frequently use your projector in different lighting conditions, consider recalibrating more often. Proper maintenance extends your lamp’s life and keeps your visuals sharp, saving you money and preserving picture quality over time.
What Is the Ideal Room Lighting for Optimal Projector Performance?
For ideal projector performance, keep ambient light low to prevent glare and washout. Aim for dim or controlled lighting, especially during movie or presentation viewing. This enhances screen contrast and guarantees vibrant images. Avoid bright overhead lights or sunlight directly hitting the screen. Using blackout curtains or dimmable lights helps create the perfect environment. Adjust room lighting based on the ambient light level to maintain the best contrast and image quality.
Can I Use Any Surface as a Projection Screen?
You can’t use any surface as a projection screen because surface limitations matter. Materials like matte white walls, specialized projector screens, or even flat, light-colored fabrics work best. Avoid shiny or textured surfaces, as they distort images and reduce clarity. Choose a smooth, opaque, and light-colored material to get the best image quality. Proper material choices guarantee sharp visuals and vibrant colors, making your projector experience much better from day one.
How Do I Prevent Projector Overheating During Extended Use?
If you want to prevent your projector from overheating during long sessions, you’ll need a solid cooling system. Use powerful cooling fans and set up excellent ventilation around the device. Keep it in a cool, well-ventilated space, and avoid blocking air vents. Regularly clean dust from fans and filters. Doing this guarantees your projector stays cool, runs smoothly, and lasts longer—no overheating disasters on your watch!
What Are Common Mistakes to Avoid During Initial Setup?
You should avoid common mistakes like neglecting proper screen calibration and incorrect lens alignment during setup. Make sure the projector is positioned correctly, with the lens aligned to the screen’s center, and calibrate the display for maximum image quality. Don’t rush these steps, as improper calibration or misaligned lenses can cause blurry images or distortions, forcing you to reconfigure later. Taking your time guarantees a clearer, sharper picture from day one.
YiePhiot Mini Ceiling Wall Projector Mount Stand Compatible with QKK, DR.J, DBPOWER, Anker, VANKYO, AAXA, Jinhoo, PVO, TMY, AuKing and Most Other Mini Projector (175mm, Black)
Universal Mount: The Universal Projector Mount is compatible with most mini projectors, including CLOKOWE, HAPPRUN, ELEPHAS, NICPOW and…
As an affiliate, we earn on qualifying purchases.
As an affiliate, we earn on qualifying purchases.
Conclusion
By applying this simple setup rule, you’re setting yourself up for success right from the start. Don’t wait for problems to arise; address calibration and positioning early on. Remember, a stitch in time saves nine, so taking these quick steps guarantees your projector performs smoothly and lasts longer. When you get the foundation right, you’ll find your setup process becomes a whole lot easier, letting you enjoy crisp images and seamless viewing without a hitch.

DTAPE 165 Ft Laser Measuring Tool, 1/16" High-Accuracy Laser Tape Measure, 2" Backlit LCD Display Laser Measure, Ft/In/Ft+In/M Electronic Tape Measure, Distance/Area/Volume/Indirect Laser Range Finder
Pro Tips: 1. Toggle front or rear reference points as needed. 2. For optimal accuracy on reflective or…
As an affiliate, we earn on qualifying purchases.
As an affiliate, we earn on qualifying purchases.

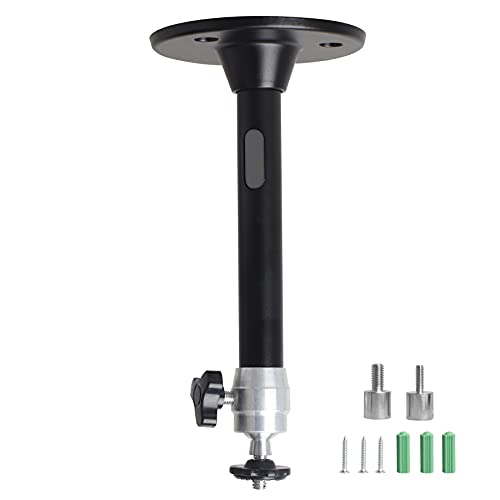
DYNAVISTA Full Motion Universal Ceiling Projector Mount Bracket with Adjustable Height and Extendable Arms Rotating Swivel Mount for Home and Office Projector (Black)
Universally Compatible: This projector ceiling mount supports most projector brands with distance between the mounting holes on back…
As an affiliate, we earn on qualifying purchases.
As an affiliate, we earn on qualifying purchases.