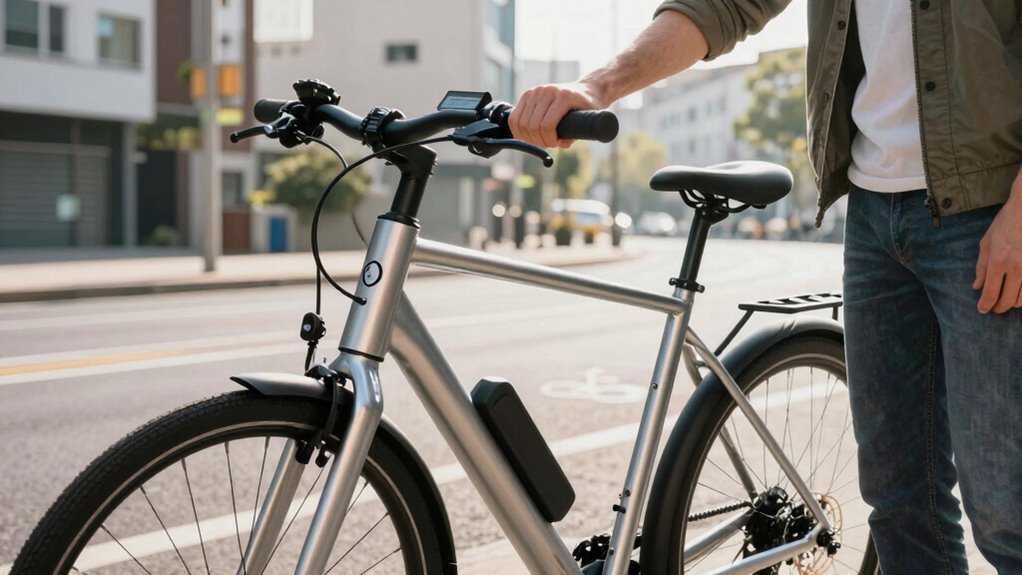

To make your commuter e-bike perform better from day one, start with a simple setup rule: use the lowest effective pedal assist level, typically 1 or 2, and adjust based on terrain or load. Monitor your battery regularly, plan routes to avoid deep discharges, and switch assist levels wisely to conserve energy. This practice helps extend battery life and guarantees a smooth ride. Stick with this approach, and you’ll discover even more ways to optimize your e-bike’s performance.
Key Takeaways
- Start with low pedal assist levels (1 or 2) to conserve battery and promote natural riding from the beginning.
- Adjust assist based on terrain and load to optimize battery use and ride efficiency.
- Regularly monitor battery percentage and plan routes to prevent deep discharges.
- Use regenerative braking to recover energy and extend battery life during stops.
- Consistently apply these principles to build efficient riding habits and improve overall e-bike performance.

Getting your commuter e-bike set up correctly can make all the difference in guaranteeing a smooth and efficient ride. The key is to establish a simple but effective setup rule that you can stick to from day one. This rule focuses on optimizing your battery and mastering pedal assist to maximize your ride quality and battery life. When you pay attention to these areas, your e-bike will perform better, last longer, and feel more natural to ride. Start by understanding how to optimize your battery. Your e-bike’s battery is its power source and the most crucial component for a reliable commute. You want to avoid unnecessary drain, which means setting your pedal assist level thoughtfully. Too high a level, and you’ll drain the battery quickly, forcing more frequent charges. Too low, and you won’t get the assistance you need for an effortless ride. The setup rule here is to begin with the lowest pedal assist setting that still provides comfortable support. For most riders, this means starting with assist level 1 or 2. As you get used to your ride, adjust based on terrain and load. Remember, conserving battery power extends its lifespan and ensures you’ll have enough juice for your entire commute. Additionally, understanding how battery optimization impacts overall performance can help you make smarter riding choices. Proper battery management not only prolongs battery life but can also improve overall ride consistency. Next, focus on the pedal assist system itself. Many e-bikes come with multiple modes, so it’s tempting to always select the maximum level. Instead, think of pedal assist as a tool for making your ride easier without over-relying on battery power. The rule is to use the lowest effective assist level for the majority of your trip. This means you get the benefit of motor help without wasting energy. When you approach hills or headwinds, bump up the assist temporarily. Once you’re past those challenges, dial it back down. This approach not only preserves your battery but also encourages a more natural pedaling rhythm. From the start, get into the habit of monitoring your battery percentage and adjusting your pedal assist accordingly. Regularly check your battery gauge and plan your ride to avoid deep discharges, which can shorten battery life. If your bike offers features like regenerative braking, make use of them to recover some energy during stops, further enhancing your battery’s efficiency. Sticking to this setup rule—optimizing the battery by starting with the lowest effective pedal assist—sets a solid foundation for every ride. It helps you ride smarter, extends your battery life, and makes your commute smoother. With consistent practice, this simple principle becomes second nature, ensuring your e-bike performs better from day one and every day after.

Chazcool Electric Bikes Sensor, Electric Bicycle Assistant Pedal Sensor, Gear Sensor for Electric Bike
- Material: High-quality durable PC plastic
- Design: Enhanced accuracy with 12 magnets
- Performance: Integrated dual Hall sensor for reliability
As an affiliate, we earn on qualifying purchases.
As an affiliate, we earn on qualifying purchases.
Frequently Asked Questions
How Often Should I Recheck My E-Bike’s Setup After Initial Adjustment?
You should recheck your e-bike’s setup at least once a month. Regularly inspect your tire pressure and make sure it’s at the recommended PSI for a smooth ride. Also, check your brake adjustment to ensure they’re responsive and safe. If you notice any unusual sounds or difficulty stopping, do these checks sooner. Staying on top of these small adjustments keeps your e-bike performing at its best and extends its lifespan.
Does the Setup Rule Vary for Different E-Bike Models?
Did you know that over 60% of e-bike riders don’t optimize their setup properly? Yes, the setup rule varies by model, especially regarding frame compatibility and tire pressure. You need to tailor adjustments based on your bike’s frame type and tire specifications to guarantee peak performance. So, always check your specific e-bike’s manual and manufacturer recommendations, because a one-size-fits-all approach doesn’t work for every model.
Can Improper Setup Reduce My E-Bike’s Battery Life?
Yes, improper setup can reduce your e-bike’s battery life. If you neglect battery calibration, the system might not accurately measure power, leading to inefficient use. Additionally, low tire pressure increases rolling resistance, forcing your motor to work harder and drain the battery faster. Regularly calibrate your battery and maintain proper tire pressure to optimize battery performance and extend its lifespan from day one.
Is Professional Setup Necessary, or Can I Do It Myself?
You can do your e-bike setup yourself, but professional bike maintenance guarantees ideal safety and performance. If you’re comfortable with tools and follow safety precautions, DIY setup is doable and saves money. However, a professional can fine-tune components, check for issues, and help avoid common mistakes that might affect battery life or safety. Whichever option you choose, prioritize safety precautions for a reliable, enjoyable ride from day one.
How Long Does It Typically Take to Properly Set up an E-Bike?
They say, “A stitch in time saves nine,” and that’s true for e-bike setup. You’ll typically spend about 30 minutes to an hour adjusting bike ergonomics and tire pressure for maximum comfort and safety. Proper setup involves checking saddle height, handlebar position, and tire pressure, which guarantees your ride is smooth and enjoyable from day one. Taking your time now prevents issues later and makes your commute more enjoyable.

Battery Monitor12v 24v 36v 48v 60v 72v,SUPNOVA Car,Golf cart Battery Tester,Digital Display Capacity 7-100V Voltage Monitor Remaining Capacity Percentage Tester with Buzzer Alarm and Temperature
- Applicable Battery Types: 7-100V lithium, lead-acid, AGM, LiFePO4
- Wide Voltage Range: Suitable for 12V to 84V batteries
- Versatile Application: Tests electric motorcycles, golf carts, cars, marine, RVs
As an affiliate, we earn on qualifying purchases.
As an affiliate, we earn on qualifying purchases.
Conclusion
By paying close attention to the setup, you’re gently steering your commuter e-bike toward smoother, more reliable rides right from the start. Think of it as giving your bike a little extra TLC—small adjustments can make a big difference in comfort and performance. Keep this simple rule in mind, and you’ll find your daily commute becomes a more enjoyable journey, almost as if your bike is whispering, “I’ve got you covered.”

Hiboy S2 Electric Scooter – 8.5" Solid Tires – Up to 17 Miles Long-Range & 19 MPH Portable Folding Commuting Scooter for Adults with Double Braking System and App (S2)
- Powerful Motor and Long Range: 350W motor, 17-mile range, UL certified
- Stable and Durable Build: Solid tires, sturdy frame for smooth rides
- Enhanced Safety Features: Triple lights, dual disc and eABS brakes
As an affiliate, we earn on qualifying purchases.
As an affiliate, we earn on qualifying purchases.
ROCKBROS Bike/Bicycle Phone Front Frame Bag, Waterproof, Tube Bag,Cycling Pouch, E-Bike Accessories for Men Compatible Phone Under 7” Straps Fit All Frames
- Large Capacity: Holds phone, keys, repair kits, and more
- Compatible with Phones Up to 7 Inches: Fits slim cases for most smartphones
- Sensitive Touch Screen Window: Allows easy phone use while riding
As an affiliate, we earn on qualifying purchases.
As an affiliate, we earn on qualifying purchases.